How to Make Latte Art: Beginner's Guide to Milk Pouring
By Coffee Studies Editorial·Published July 18, 2026·6 min read
Quick answer

Latte art is the last step in making an espresso drink — the part that is visible to the customer. It is also the part that most new baristas spend the most time thinking about and the least time actually being able to do well.
The reason is that latte art cannot exist without two things being done correctly first: the espresso and the milk. A poor shot with no crema cannot hold a pattern. Poorly steamed milk that is coarse and stiff cannot float and shape into a design. Learning to make latte art means first learning to make consistently good espresso and consistently good microfoam — the art is the result of those two skills, not a substitute for them.
Two prerequisites before the pour
latte art requires espresso with intact crema (which the foam floats on) and microfoam (fine, glossy, pourable milk) — without both, no pattern is possible regardless of pour technique[1]
Heart → tulip → rosetta
the learning sequence follows difficulty — a heart can be produced in weeks, a tulip in one to two months, a consistent rosetta takes two to four months of daily practice[2]
Pitcher angle and distance control the pattern
latte art is shaped by the angle of the pitcher, the distance from the cup surface, and the flow rate — the wrist motion is what creates the pattern; all three must be controlled simultaneously[1]
Why the basics come first
Before any latte art technique: you need to be able to produce:
-
A well-extracted espresso with visible crema. The crema (the reddish-brown foam on top of a fresh espresso) is the surface the milk foam floats on. A weak shot, an over-extracted shot, or espresso that has sat for more than a minute will have degraded or absent crema. Latte art on these shots does not hold — the foam sinks.
-
Proper microfoam. Microfoam is steamed milk with fine, almost invisible bubbles and a glossy, pourable consistency. It should look like wet paint. Froth with large bubbles, or stiff dry foam, will not produce defined latte art — the foam cannot flow into the espresso to create a pattern[1].
If your shots and milk are inconsistent, latte art will be inconsistent regardless of how you move the pitcher. Fix the espresso and milk technique first.
The pour mechanics
Latte art is produced by controlling three variables simultaneously:
Distance from the cup: Start 3–4 cm above the cup surface. At this height, the milk falls through the crema and mixes with the espresso (filling the cup) without creating a pattern yet. This is the filling phase.
When to lower: As the cup fills to roughly two-thirds full, lower the pitcher spout close to the surface of the liquid — within 1 cm. At this distance, the microfoam begins to float on the crema rather than sink through it. This is when the pattern begins to form.
Flow rate: A slow, controlled, steady pour. Too fast and the foam sinks; too slow and it pools in one spot without flowing into a shape. The rate comes from the tilt of the pitcher — controlled by the wrist.
Cup angle: Hold the cup tilted toward you at roughly 20–30 degrees during the fill phase. This pools the espresso at one end, giving more surface for the foam to work with when the pattern begins.
Pouring is a jug problem before it is a wrist problem: a spout that is too round will not cut a line however well you move.
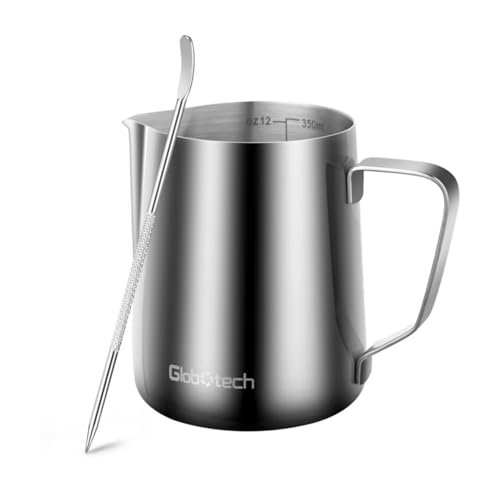 12oz steaming pitcherStainless Steel Milk Frothing Pitcher 12 Oz, 350ml Latte Art Cup Espresso Machine Accessories, Steaming Jug for Cappuccino Coffee Milk Hot Chocolate CupsTwelve ounces is the size that suits a single drink: too large and the milk is too shallow to roll, too small and it climbs out. The spout shape matters more than the brand, which is why the Canadian link goes to a search rather than to one arbitrary maker of what is a commodity.amazon.com $9.99 USDnot sold on amazon.caPrice and availability as of View on Amazon
Product prices and availability are accurate as of the date/time indicated and are subject to change. Any price and availability information displayed on Amazon at the time of purchase will apply to the purchase of this product. Certain content that appears on this site comes from Amazon. This content is provided ‘as is’ and is subject to change or removal at any time.
Pattern 1: the heart
The heart is the entry point. It is one continuous motion.
- Fill the cup to two-thirds (pitcher high, mixing phase)
- Lower the pitcher to the surface
- Begin a steady pour in the centre of the cup — a dollop of foam will form (a white circle)
- As the white circle forms, push the pitcher forward (toward the far end of the cup) with a single forward sweep
- Finish by pulling the pitcher up and moving it toward you in one motion — this cuts through the white circle, pulling a point and creating the bottom of the heart
The forward push creates the top of the heart; the pull- through creates the point at the bottom. The whole motion takes about one second and is a single fluid sweep.
Common errors: pausing between the forward push and the pull-through (breaks the pattern), pulling through too slowly (the lines bleed together), not lowering the pitcher close enough to the surface (foam sinks instead of floating).
Pattern 2: the tulip
The tulip is the heart repeated in layers. Instead of one continuous motion, the tulip involves three short pours in sequence, each interrupted briefly.
- Fill to roughly half full (mixing phase, pitcher high)
- Lower to the surface, pour a small dollop of foam (this is the first petal — bottom of the tulip)
- Pause briefly — stop the flow by tilting the pitcher back slightly
- Move the pitcher backward slightly (toward you) and pour a second larger dollop, pushing it into the first (the first petal moves down the cup, creating a ring)
- Pause briefly again
- Move the pitcher back again, pour a third dollop, push into the second
- Pull through as with the heart to finish
Each pause-and-restart creates a defined layer. The more layers, the more petals. Three layers = three-petal tulip. Two layers = simpler tulip or a "double heart."
The challenge is the pause — stopping and restarting flow cleanly without creating a blob[2].
Pattern 3: the rosetta
The rosetta (sometimes called a fern or leaf) is the standard test of barista skill and the most practised pattern in specialty coffee. It requires a side-to-side wrist oscillation during the pour.
- Fill to roughly half full (mixing phase)
- Lower the pitcher to the surface
- Begin pouring in the centre, moving the pitcher slowly backward (toward you) while oscillating the wrist side-to-side — left-right-left-right rapidly
- The side-to-side motion creates the leaf/fern pattern — white lines alternating left and right
- As you reach the near edge of the cup, slow the oscillation
- Pull through the centre of the pattern to finish, cutting the centre line and completing the stem
The oscillation must be regular and at a constant rate. Too fast and the lines merge; too slow and the pattern is widely spaced and uneven. The backward movement must be slow and controlled.
The rosetta is what takes months. The individual components are understandable; the coordination of backward movement, oscillation, and pour rate simultaneously requires muscle memory that builds from repetition[1].
Practice approach
Volume is the variable. Latte art improves through repetition, not through thinking harder about it. A barista who makes 50 drinks a day will develop faster than one who makes 10, regardless of equal intention.
Use water and dish soap to practise the pour without waste. A pitcher of soapy water creates a foam that behaves similarly to milk microfoam and can be poured into a mug of dark liquid (coffee-coloured water) to practise the pour mechanics without using milk or espresso.
Film your pours. Watching a slow-motion video of your own pour reveals exactly where the motion breaks down.
Practice on espresso, not drip coffee. You need crema. The pattern will only work on fresh espresso.
The honest summary
Latte art requires espresso with crema and properly steamed microfoam — both must be in place before the pour technique matters. The pour itself involves lowering the pitcher close to the surface when the cup is two-thirds full, then controlling flow rate, distance, and pitcher movement to create the shape. A heart requires a forward push and a pull-through. A tulip requires the heart motion in layers with pauses between. A rosetta requires wrist oscillation during a slow backward movement. The heart is achievable in weeks; the rosetta takes two to four months of daily practice to produce consistently. There is no shortcut — muscle memory is built through volume.
Frequently asked questions
- How long does it take to learn latte art?
- A heart pattern can be produced by most beginners within a few weeks of daily practice. A consistent tulip takes one to two months. A recognisable rosetta takes two to four months of practising every shift. 'Consistent' is the key word — any barista can produce a lucky good pour; producing the same pattern to the same standard on every drink, under a busy bar's pace, takes significantly longer than producing it once.
- What do you need for latte art?
- You need: (1) an espresso machine that produces espresso with a stable crema — weak or absent crema means the foam has nothing to float on; (2) a steam wand and stainless pitcher to produce proper microfoam — dry froth or large-bubble foam will not produce defined latte art; (3) practice. Equipment quality matters, but most of the learning is in the pour — angle, flow rate, wrist motion.
- Can you do latte art with a milk frother?
- Rarely. Defined latte art requires microfoam — fine, pourable bubbles that float on crema and hold a shape when manipulated. A handheld frother produces coarser, stiffer froth that either sinks into the espresso or sits on top without forming patterns. Some people produce simple free-pour patterns with a handheld frother and practice, but the result is rarely as defined as steam-wand microfoam. If latte art is the goal, a steam wand is the required tool.
- Why does my latte art sink?
- The most common reasons: (1) the milk is not microfoam — if bubbles are visible or the milk looks matte rather than glossy, the foam is too coarse and will sink rather than float; (2) pouring too slowly — the milk hits the crema and mixes in before the foam can float; (3) the espresso crema is weak or absent — without crema, there is no surface for the foam to float on; (4) the pitcher is too close or too far from the cup surface. Start the pour high (3–4 cm above the surface) to let espresso and milk mix, then lower the pitcher to the surface as the cup fills.
- What is free pour vs etching in latte art?
- Free pour latte art is created during the pour — the shape comes from how you move the pitcher while pouring. Heart, tulip, and rosetta are all free-pour patterns. Etching (or drawing) uses a tool — a toothpick, skewer, or latte art pen — to draw patterns in the foam after pouring. Etching produces more complex shapes (detailed portraits, patterns) but is not considered traditional barista skill in competition contexts. Free pour is the standard in specialty coffee.
References
Every factual claim in this article is drawn from the sources below. See the source library for how we grade evidence.
- [1]Brewing FundamentalsCoffee Science Foundation · Reference work · Tier 2 · Moderate
- [2]SCA Coffee Skills Programme — Module Descriptions and Assessment StandardsSpecialty Coffee Association (SCA) · 2024 · Reference work · Tier 3 · Contextual
Related reading
- Barista SkillsHow to Steam and Froth Milk for Coffee→
- Barista SkillsHow to Become a Barista: Skills, Training, First Jobs→
- Barista SkillsDialing In Espresso: How to Adjust Your Shot→
- Barista SkillsBarista Salary in Canada: What Baristas Actually Earn→
- Barista SkillsSCA Barista Certification: Is the Programme Worth It?→
- Espresso & Coffee DrinksLatte Art: How to Pour Designs in Milk Foam→