How to Steam and Froth Milk for Coffee
By Coffee Studies Editorial·Published July 18, 2026·6 min read
Quick answer

Milk steaming is the skill that separates coffee that looks and feels like a café drink from coffee that tastes the same but feels wrong in the mouth. The difference is in the texture of the milk — and texture is created by technique.
Microfoam — the fine, glossy, almost velvety milk used in lattes and flat whites — is not a product of magic or expensive equipment. It comes from a specific sequence of actions with a steam wand, done in a specific order, at a specific temperature. Once you understand the mechanism, the technique is learnable.
60–65°C is the target
milk steamed above 70°C tastes scorched and flat; below 55°C it tastes cool and under-developed; 60–65°C is the standard target in SCA barista training and professional café practice[2]
Air goes in first
microfoam requires injecting a small amount of air at the very start of steaming — the first 2–3 seconds — before submerging the wand to spin and heat; air added to already-warm milk creates large bubbles, not microfoam[1]
Whole milk steams best
whole cow's milk produces the most stable, consistent microfoam due to its fat and protein balance; among plant milks, barista oat milk is the closest substitute in texture and behaviour[1]
Steamed milk vs frothed milk
These are the same process producing different results depending on how much air is incorporated:
Microfoam (steamed milk): a small amount of air is incorporated — enough to increase the volume of the milk by 20–30% — and then integrated into the milk through spinning. The result is a glossy, pourable liquid with fine bubbles that hold together. Used in lattes, flat whites, cappuccinos (wet), and cortados.
Dry froth: more air is incorporated, the milk expands significantly (50–100% or more), and the foam is stiffer, lighter, and holds its shape. Used in traditional cappuccinos, macchiatos, and drinks where the foam is meant to sit on top rather than integrate. The texture is cloud-like rather than silky.
The same steam wand and same milk produce either result. The control is in how long the wand is positioned at the surface (incorporating air) vs below the surface (spinning without adding air)[1].
The technique: microfoam with a steam wand
Equipment: espresso machine with a steam wand, stainless steel milk pitcher (12 oz or 20 oz depending on drink size), thermometer (optional but useful when learning).
Milk amount: fill the pitcher to just below the spout insert — roughly one-third full before steaming. The milk will expand during steaming.
Step-by-step:
-
Purge the wand. Open the steam valve briefly to clear any condensed water from the wand tip. Wipe the wand with a damp cloth.
-
Position the wand. Place the tip just below the surface of the milk, slightly off-centre (to create a spinning motion when steam hits).
-
Open the valve fully and inject air. In the first 2–3 seconds, keep the wand tip at the surface — you should hear a hissing, tearing sound and see the milk level begin to rise slightly. This is air incorporation. Do not linger here too long. The goal is a controlled addition of air, not maximum volume.
-
Submerge and spin. After 2–3 seconds, lower the pitcher slightly so the wand tip is about 1–2 cm below the surface. The steam should drive a spinning whirlpool in the milk. You should hear a deeper, rolling sound rather than a surface hiss. Stop adding air; just heat and spin from here.
-
Watch the temperature. The bottom of the pitcher will go from cool, to warm, to uncomfortably hot. When the pitcher is too hot to hold your palm against for more than a second — that is roughly 65°C. Remove from the wand just before that point.
-
Close the valve, purge, wipe. Turn off the steam, purge the wand again, wipe immediately.
-
Tap and swirl. Tap the pitcher on the counter once or twice to break any large surface bubbles, then swirl in a circular motion for 5–10 seconds. The milk should look glossy and uniform — no visible bubbles, the surface should have a slight sheen like wet paint[2].
Frothing without a steam wand
Handheld electric frother (aerolatte or similar): Heat the milk first to 60–65°C (microwave or stovetop), then submerge the frother and run for 20–30 seconds. Produces coarser froth than a steam wand but usable for home lattes.
French press: Heat the milk separately, pour into the French press, and pump the plunger up and down rapidly 30–40 times. Produces airy froth — better for cappuccino-style foam than microfoam.
Nanofoamer (or similar pneumatic device): A step closer to steam-wand texture than either above. Worth investing in if you make home lattes regularly with a moka pot or AeroPress.
Milk frother wand attachment (for Nespresso etc.): Many domestic espresso systems include a steam attachment. These work on the same principle as a commercial steam wand but with lower steam pressure — the technique is similar, the result is slightly more variable.
None of these produce identical results to a well-executed commercial steam wand, but the handheld frother plus good espresso is enough to make a latte at home that satisfies most people.
How different milks behave
| Milk type | Foam quality | Notes |
|---|---|---|
| Whole cow's milk | Excellent microfoam, very stable | The training standard |
| 2% cow's milk | Good, slightly lighter | Works well for most drinks |
| Skim milk | Stiffer, less creamy | Good for dry foam, less good for microfoam |
| Barista oat milk | Good-to-excellent | Best plant milk for steaming; formulated for it |
| Standard oat milk | Fair | Less stable than barista versions |
| Almond milk | Thin, unstable | Separates easily; difficult to work with |
| Soy milk | Fair | Can split at high temperature; keep at 60°C |
| Coconut milk | Poor to fair | Thin and separates; not ideal for latte art |
The "barista" version of plant milks (oat, almond, soy) contains added proteins and emulsifiers that improve steaming behaviour. If you are using plant milk regularly, barista formulations are worth the slight price premium[1].
The thermometer is worth having while you are learning where 60C sits by feel, and worth abandoning once you know. The frother is a different tool rather than a lesser one: it aerates without heating, which is what you want for an iced drink and never what you want for a flat white.
For learning the temperature
 Dial thermometer for the pitcherCDN ProAccurate® Instant Read Beverage Frothing Thermometer with Clip for Precise Temperature Measurement, 5" Stainless Steel Stem, Black Case (IRT220-F)Useful while you are learning where 60C is by feel, and unnecessary once you know. Clips to the pitcher so the probe sits in the milk rather than against the metal, which is the only way the reading means anything.amazon.com $8.50 USDamazon.ca $11.75 CADPrice and availability as of View on Amazon
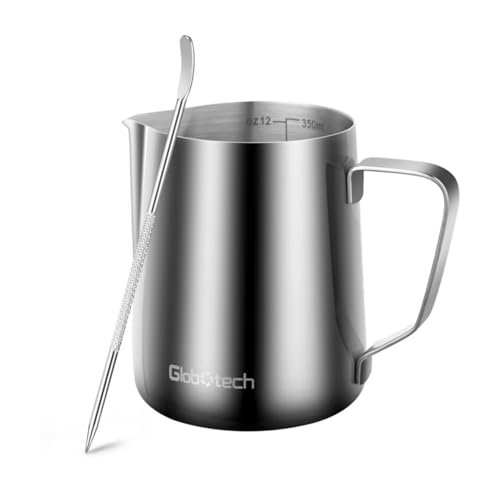 12oz steaming pitcherStainless Steel Milk Frothing Pitcher 12 Oz, 350ml Latte Art Cup Espresso Machine Accessories, Steaming Jug for Cappuccino Coffee Milk Hot Chocolate CupsTwelve ounces is the size that suits a single drink: too large and the milk is too shallow to roll, too small and it climbs out. The spout shape matters more than the brand, which is why the Canadian link goes to a search rather than to one arbitrary maker of what is a commodity.amazon.com $9.99 USDnot sold on amazon.caPrice and availability as of View on Amazon
 Handheld frotherCIRCLE JOY Rechargeable Milk Frother Handheld, Dual Coil Whisk Head Electric Coffee Frother, Portable Hand Frother Wand Drink Mixer for Matcha Lattes Cappuccino, Kitchen Gifts, BlackWorth being plain about what this does and does not do. A wand whips air into milk and makes foam, which is enough for a cappuccino-style drink at home. It does not make the dense, wet microfoam a steam wand produces, which is what a flat white is defined by, so the drink it gets you closest to is a cappuccino rather than a latte or a flat white.amazon.com $8.99 USDamazon.ca $13.99 CADPrice and availability as of View on Amazon
Product prices and availability are accurate as of the date/time indicated and are subject to change. Any price and availability information displayed on Amazon at the time of purchase will apply to the purchase of this product. Certain content that appears on this site comes from Amazon. This content is provided ‘as is’ and is subject to change or removal at any time.
Common mistakes
Too much air: the most common error for beginners. Spending too long with the wand at the surface creates large bubbles. Fix: move to the submerged spinning position after 2–3 seconds, not longer.
Air added when the milk is already warm: once milk is above 40°C, large bubbles form and do not integrate. Air must go in while the milk is still cold. Fix: start immediately from cold milk, inject air only in the first seconds.
Too hot: milk above 70°C tastes flat and slightly sweet-scorched; the foam breaks down faster. Fix: use a thermometer until hand-feel is calibrated. Remove from the wand at 65°C.
Not purging or wiping the wand: old milk residue on the wand burns onto the tip and introduces off-flavours. Fix: purge before and after every steam, wipe immediately after.
Pitcher too full: milk expands during steaming. An overfull pitcher boils over; an underfull pitcher makes it hard to create the spinning vortex. Fix: fill to just below the spout insert, roughly one-third to half full.
The honest summary
Steaming milk to microfoam requires three things: injecting a controlled amount of air in the first 2–3 seconds, then spinning the milk while heating it to 60–65°C without adding more air, then tapping and swirling to integrate any remaining bubbles into a glossy, uniform foam. Too much air produces coarse froth; the correct amount produces microfoam with a silky texture suitable for latte art and a smooth mouthfeel. Whole cow's milk is the easiest to work with; barista oat milk is the best plant-milk alternative. Without a steam wand, a handheld electric frother is the most practical substitute.
Frequently asked questions
- What is the difference between steamed milk and frothed milk?
- Steamed milk (microfoam) has very fine, almost invisible bubbles that create a silky, pourable texture — used in lattes and flat whites. Frothed milk (dry foam) has larger, visible bubbles and a stiffer, airy texture — used in cappuccinos and macchiatos. The same technique produces either result depending on how much air you incorporate: more air = more froth. Microfoam is harder to produce consistently and is what most specialty baristas spend the most time learning.
- What temperature should milk be steamed to?
- 60–65°C (140–150°F) is the standard target range. Below 55°C, the milk tastes cool and the sweetness doesn't fully develop. Above 70°C, milk proteins begin to denature — the milk tastes scorched or flat, and the foam breaks down faster. The SCA recommends 60–65°C. Without a thermometer, the pitcher feels too hot to hold comfortably at around 65°C. Most baristas use a thermometer until they have calibrated the hand-feel.
- How do you make microfoam without an espresso machine?
- Without a steam wand, the closest alternatives are: (1) a handheld milk frother (electric whisk) — heat the milk first, then whisk for 20–30 seconds; produces froth, not true microfoam, but works for home lattes; (2) a French press — heat the milk, pour into the press, pump 20–30 times; produces airy froth; (3) a Nanofoamer or similar pneumatic frother — produces something closer to microfoam than a whisk. None of these exactly replicate steam-wand microfoam, but the handheld frother is the most accessible substitute.
- Which milk is easiest to froth?
- Whole cow's milk produces the most stable, reliable microfoam due to its fat and protein content — it is the standard used in barista training. 2% milk also works well with slightly lighter foam. Among plant milks, oat milk (particularly barista-formulated versions) steams most similarly to whole milk and is the most popular choice at specialty cafés. Almond milk produces thinner, less stable foam; soy milk can work but is prone to splitting at high temperatures.
- Why does my milk froth have big bubbles?
- Large bubbles indicate too much air was added too fast, or the air was added too late (when the milk is already warm, the air cannot be integrated). The fix: inject air only in the first two seconds of steaming — just a brief hiss — then submerge the wand tip just below the surface to spin the milk without adding more air. The spinning action breaks large bubbles into smaller ones. If large bubbles persist, tap the pitcher on the counter and swirl immediately after steaming.
References
Every factual claim in this article is drawn from the sources below. See the source library for how we grade evidence.
- [1]Brewing FundamentalsCoffee Science Foundation · Reference work · Tier 2 · Moderate
- [2]SCA Coffee Skills Programme — Module Descriptions and Assessment StandardsSpecialty Coffee Association (SCA) · 2024 · Reference work · Tier 3 · Contextual
Related reading
- Barista SkillsHow to Make Latte Art: Beginner's Guide to Milk Pouring→
- Barista SkillsHow to Become a Barista: Skills, Training, First Jobs→
- Barista SkillsDialing In Espresso: How to Adjust Your Shot→
- Barista SkillsBarista Salary in Canada: What Baristas Actually Earn→
- Barista SkillsSCA Barista Certification: Is the Programme Worth It?→
- Coffee AlternativesGolden Milk (Turmeric Latte): The Complete Guide→