How to Roast Coffee Beans at Home, 3 Ways
By Coffee Studies Editorial·Published November 21, 2026·7 min read
Quick answer
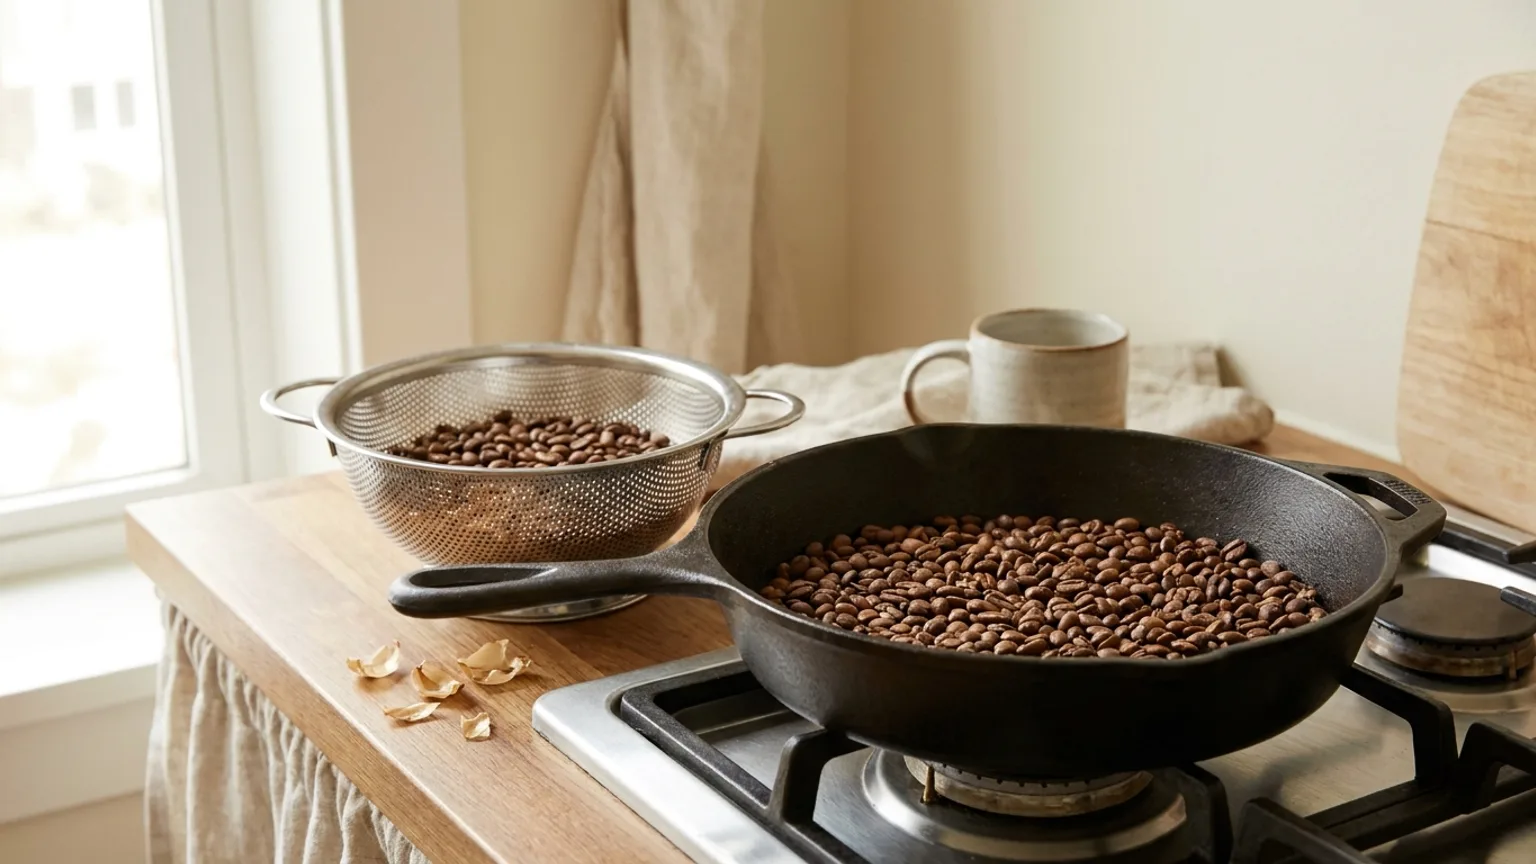
Yes, you can roast coffee in an ordinary kitchen, and you don't need a dedicated roaster to begin. You need serious heat, beans that keep moving, and attentive ears. This guide covers three household methods, the sounds that tell you where the roast is, and what to do once it's finished.
Can you really roast coffee beans at home?
You can. A green coffee bean is a hard, pale seed that smells faintly of grass and brews into nothing you'd enjoy. Roasting transforms it into the brittle, fragrant brown bean you recognise.
Green beans contain about 8 to 12% water before roasting. [1] Heat evaporates that moisture, then triggers the browning reactions that create coffee's flavour. A popcorn popper or a skillet does the same job as a commercial roaster, only in smaller batches and with less precision.
What you'll need:
- Green coffee beans. Begin with about 100 grams for a practice batch.
- A heat source. A hot-air popcorn popper, a heavy skillet, or your oven.
- A metal colander for cooling the finished beans quickly.
- A kitchen scale. Weight loss measures how far the roast travelled.
- Ventilation. Roasting produces smoke and papery skins called chaff.
What happens to a bean as it roasts?
Every method follows the same sequence of stages. Learn them once and you can roast with almost any equipment.
170 to 200 °C
where first crack usually happens, the popping sound that means the beans are drinkable[1]
12 to 14% lighter
the roasting weight loss where a 2024 study's brews extracted best; much lighter roasts read as underdone[2]
11 minutes 25 seconds
one lab's standard roast from start to finish, with 2 minutes 40 seconds after first crack[3]
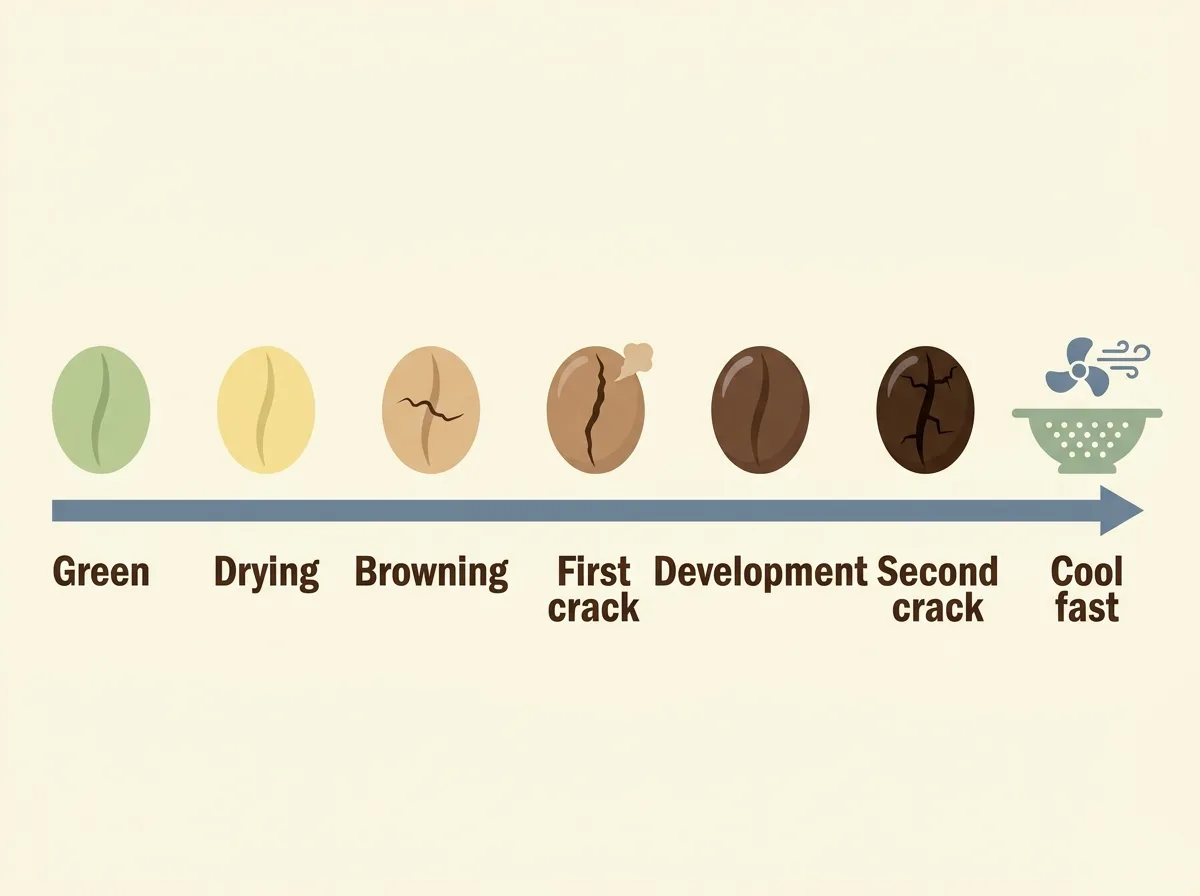
The stages of a roast, in order. Phase names follow a 2024 roasting study in Scientific Reports.
-
Drying. Moisture escapes and the beans gradually turn from green to yellow. [1]
-
Browning. The colour deepens to tan, then brown, and the aroma becomes toasty.
-
First crack. You'll hear sharp pops. One study defined it as three or more pops within three seconds. [2]
-
Development. This is the period after first crack, and it determines how light or dark the roast finishes.
-
Second crack. A quieter, quicker crackle, like breakfast cereal in milk. Beyond this point, the roast is officially dark.
Light, medium and dark roasts all finish somewhere between 195 and 245 °C. [4] You can't measure that accurately in a frying pan, which is exactly why listening matters more than a thermometer.
Which kitchen method should you use?
Choose whichever method keeps the beans moving most evenly. Uneven heating is the biggest problem in home roasting.
| Method | How the beans move | Batch size | Main drawback |
|---|---|---|---|
| Hot-air popcorn popper | Hot air spins them | Small, about half a cup | Fast, so stages blur together |
| Heavy skillet | You stir them | Medium | Your arm does all the work |
| Oven on a tray | They don't, unless you shake the tray | Large | Most uneven of the three |
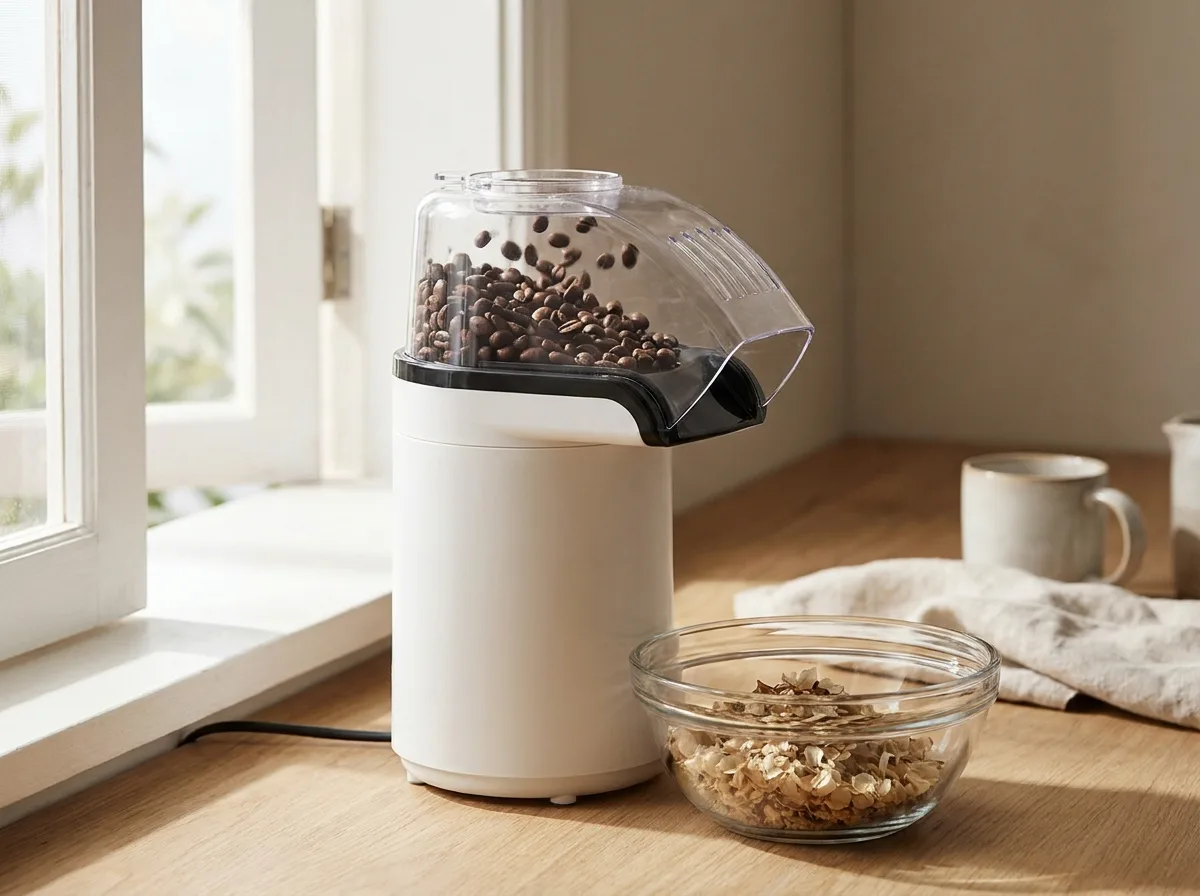
The popper is the easiest starting point, because it circulates the beans automatically and blows the chaff away. The skillet teaches you the most about the process. The oven handles the largest quantity but delivers the least consistent colour.
How do you roast coffee in a popcorn popper?
Choose a hot-air popper whose air enters through slots in the side of the chamber, so the beans circulate. Avoid models with a mesh screen across the bottom, where beans and chaff can rest directly on the heating element.
-
Position the popper beside an open window or outdoors, with a bowl under the chute.
-
Add about half a cup of green beans. They should circulate, not sit motionless.
-
Switch it on and stay nearby while the beans turn yellow, then brown.
-
Chaff will float out the top as the beans dry. That's completely normal.
-
Listen carefully for first crack and note the time.
-
Unplug two or three minutes later for a light roast, or later still for a darker one.
-
Pour the beans immediately into the colander to cool.
If the beans don't circulate at first, remove a few. As they dry and become lighter, the remaining beans will begin spinning on their own.
How do you roast coffee beans in a pan?
Use a heavy skillet without a lid, or with a glass lid you can see through. Cast iron holds temperature well, which helps considerably.
-
Preheat the pan on medium to medium-high for a few minutes.
-
Add a single layer of beans without overcrowding them.
-
Stir continuously. A wooden spoon or a whisk works beautifully.
-
Watch the colour. If some beans blacken while others stay green, reduce the heat.
-
Listen for first crack, then continue stirring.
-
Transfer the beans to the colander when they reach your preferred colour.
Expect patchy colour on your first attempt, since pan roasts are rarely as even as popper roasts. Your shoulder will complain before your coffee does.
Can you roast coffee beans in the oven?
Yes, although it's the most difficult way to achieve an even roast. Heat arrives mainly from above and below, and the beans lie still.
-
Preheat the oven to its highest setting.
-
Spread the beans in a single layer on a perforated tray or an ordinary baking tray.
-
Roast them on the middle rack, shaking the tray every couple of minutes.
-
Listen for first crack, which sounds quieter through an oven door.
-
Remove the tray as soon as the beans reach the colour you want.
A toaster oven works the same way with a smaller batch. A wood-fired pizza oven is generally too hot and too unpredictable to control.
How long after first crack should you stop?
This is the most important decision in any roast. In one laboratory study, both faulty roasts with under two minutes after first crack tasted wrong: one underdeveloped, one scorched. [3]
Use first crack as your stopwatch:
- Light roast: stop two to three minutes after first crack begins. The laboratory's standard roast continued 2 minutes 40 seconds past it. [3]
- Medium roast: continue a little longer, until the beans are evenly brown and still dry.
- Dark roast: keep going until second crack begins, then stop shortly afterwards.
In a 2024 study, second crack appeared only in roasts that continued 5 or 7 minutes past first crack. [2] A popcorn popper runs hotter, so it may arrive sooner. Rely on sound and colour together, not the clock alone.
Weigh the beans to confirm. Weigh them green, then again once cool. In the same study, roasts losing 8.9% and 11.6% of their weight were judged underdeveloped. [2]
Extraction peaked in roasts that lost roughly 12 to 14%. [2] So 100 grams of green beans should finish around 86 to 88 grams for a light to medium roast.
A scale for checking weight loss
- Scale with a timer, 0.1gScale with a timer, 0.1gScale with a timer, 0.1gDose and ratio are the two variables you can fix for free, and neither is fixable by eye: a scoop of beans varies by several grams depending on bean size and how it was filled. A timer on the same device means you are reading one instrument instead of two.no price from amazon.comno price from amazon.caView on Amazon
Product prices and availability are accurate as of the date/time indicated and are subject to change. Any price and availability information displayed on Amazon at the time of purchase will apply to the purchase of this product. Certain content that appears on this site comes from Amazon. This content is provided ‘as is’ and is subject to change or removal at any time.
Why do the beans need to cool fast and then rest?
Hot beans continue roasting from their own stored heat. Leave a light roast sitting in a hot pan and it drifts toward medium.
Cool them within minutes. Toss the beans between two colanders, or stir them in front of a fan. In the 2024 study, beans were air-cooled and stirred for 2 to 3 minutes until nearly room temperature. [2] Do this outdoors or beside a window, and the remaining chaff blows away.
Then let them rest. Freshly roasted beans release carbon dioxide for days. That's the gas that makes fresh grounds puff up under hot water, explained in why coffee blooms.
One review recommends resting beans 18 to 24 hours after roasting. [1] The 2024 study waited 10 days before brewing. [2] Try a cup on day one and again on day four, then decide which you prefer.
Store rested beans in an airtight container away from light. Our guide on how to store coffee beans covers the details.
What goes wrong on your first few roasts?
Most beginner batches fail in a few predictable ways:
-
Excessive smoke. Roasting is smoky, and darker roasts are considerably worse. Run the range hood on high, open a window, or roast outdoors. Your smoke alarm will have opinions.
-
Uneven colour. The beans didn't move enough. Use a smaller batch and stir or shake more often.
-
Sour, grassy flavour. You stopped too early after first crack. Continue another minute next time.
-
Bitter, ashy flavour. You went too far beyond second crack. Remove the beans sooner.
-
Chaff everywhere. Roast beside a window or outdoors, with a bowl or bag nearby.
Record the time of first crack, when you stopped, and the weight before and after. After three or four roasts, those notes will teach you more than any guide. For the chemistry behind the colour change, read our explainer on coffee roasting chemistry. To compare the finished results, see light vs medium vs dark roast.
Watch
See it, not just read it
2 videos picked for this page. They play right here, full screen on a phone, and you come straight back to the article.
Hosted on YouTube. Credit belongs to the channels named.
Frequently asked questions
- Can you roast coffee beans in an air fryer?
- People do, but we found no tested method to point you to. An air fryer blows hot air like a popper, but the beans sit in a basket instead of tumbling, so they tend to roast unevenly. If you try it, shake the basket often, listen for first crack, and weigh the beans after.
- Is roasting your own coffee worth it?
- It is if you enjoy the process. Green coffee keeps far longer than roasted coffee, so you can buy in bulk and roast a week's worth at a time. Your first roasts will be uneven, though. Plan on a few practice batches before you beat a good local roaster.
- Where do you get green coffee beans for home roasting?
- Specialty green-coffee shops sell them online in small bags, and some local roasters will sell you a few pounds if you ask. Start with a washed coffee from Central America. It roasts evenly and forgives mistakes better than many naturals.
- Can you re-roast coffee beans that came out too light?
- You can put them back in, but they rarely taste right. The roast loses its rhythm once the beans cool, so the outside darkens before the inside catches up. It is usually better to brew the light batch and adjust the next one.
- How do you roast and grind coffee beans at home?
- Roast, cool and rest the beans first. Grind only what you need right before you brew, using a burr grinder if you can. Freshly roasted beans grind a little differently day to day as they give off gas, so expect to adjust the grind.
References
Every factual claim in this article is drawn from the sources below. See the source library for how we grade evidence.
- [1]Thermal contaminants in coffee roasting: a reviewMDPI (IJERPH) · 2023 · Review · Tier 2 · Moderate
- [2]Caffeine content in filter coffee brews as a function of degree of roast and extraction yieldScientific Reports · 2024 · Observational study · Tier 2 · Moderate
- [3]Coffee volatile compounds and roast markersPMC / NIH · 2016 · Review · Tier 2 · Moderate
- [4]Impact of roasting on phenolic and volatile compounds in coffeePMC / NIH · 2022 · Review · Tier 2 · Moderate
Related reading
- Beans, Roasts & OriginsThe Coffee Roasting Process: From Green Bean to Brown→
- Beans, Roasts & OriginsLight vs Medium vs Dark Roast: Flavour, Caffeine, Facts→
- Beans, Roasts & OriginsCoffee Roasting Chemistry: Maillard Reaction and Flavour→
- Beans, Roasts & OriginsThe 15-15-15 Coffee Rule: Who Made It Up, and When→
- Beans, Roasts & OriginsRwandan Coffee: Origin, Profile, and Specialty Revival→
- Beans, Roasts & OriginsCoffee Consumption by Country, Per Person→
